This is an overview of the settings included in Event Tickets. First, we’ll take a look at the plugin’s general settings when it is used as a standalone ticketing solution. Then, we’ll cover the additional plugin settings for when the plugin is used alongside The Events Calendar.
Settings overview
First, let’s start by looking at the available settings for when Event Tickets is used as a standalone plugin, without The Events Calendar.
General settings
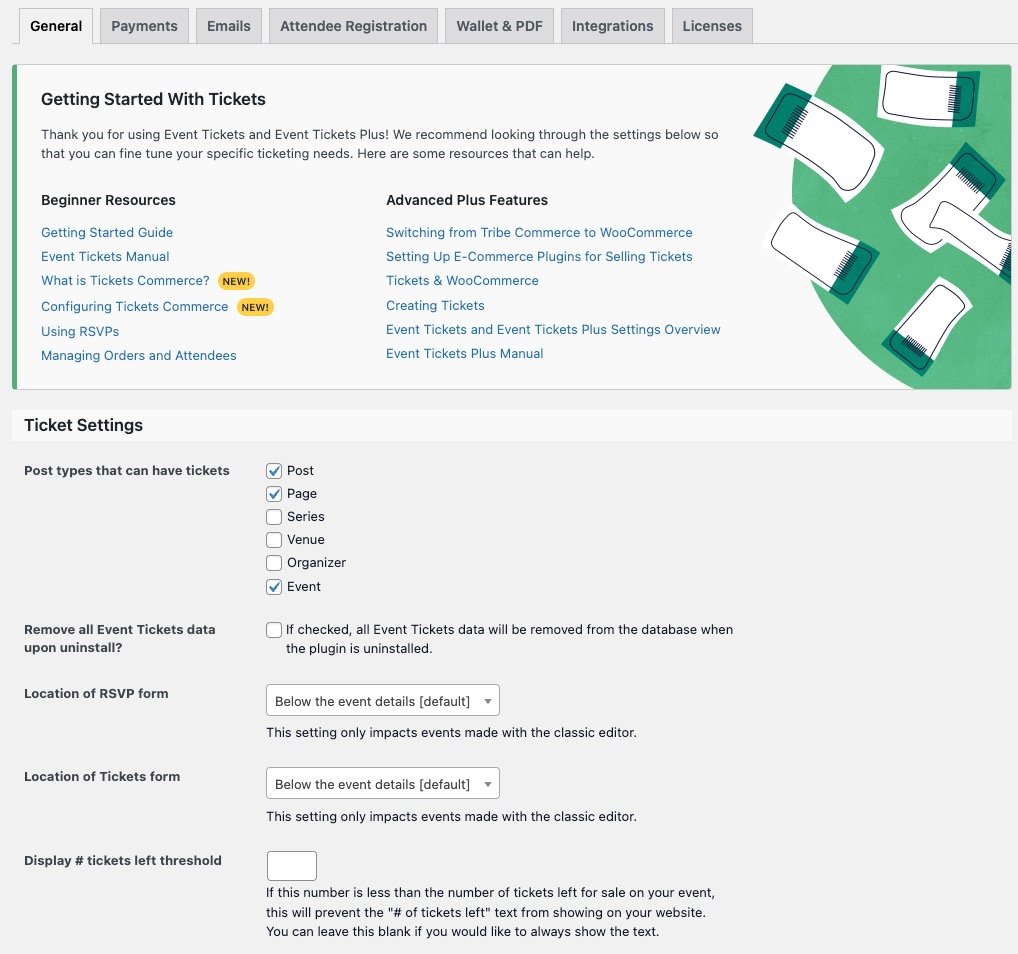
- Post types that can have tickets: Determines which types of posts support creating tickets. Custom post types are supported and will be displayed as options if they are available.
Login requirements
- Require users to log in before they RSVP: If enabled, users will be required to be a registered user on your site and logged into WordPress to complete an RSVP.
- Require users to log in before they purchase tickets: If enabled, users will be required to be a registered user on your site and logged into WordPress to purchase a ticket.
- Debug mode. Enabling this option allows PHP errors to be logged to your site’s PHP error log, which is handy for troubleshooting possible issues, such as conflicts with other plugins. By default, the setting is disabled, and we recommend using it only for troubleshooting to get the best performance from the plugin.
- Compact Date Format: Sets how the date is formatted when selecting the start and end sale date for tickets in the editor.
- RSVP Display Settings: Allows you to enable the new RSVP experience, which will update the appearance and user-flow of your RSVPs.
Payments

Here, you can toggle on the option to Enable Tickets Commerce. Once you do, you’ll see all of your Tickets Commerce options.
Next, click on the blue button to Connect Automatically with PayPal or Connect Automatically to Stripe.
Once you follow the prompts to connect to your payment gateway of choice, you’ll see the available options in the Payments tab.
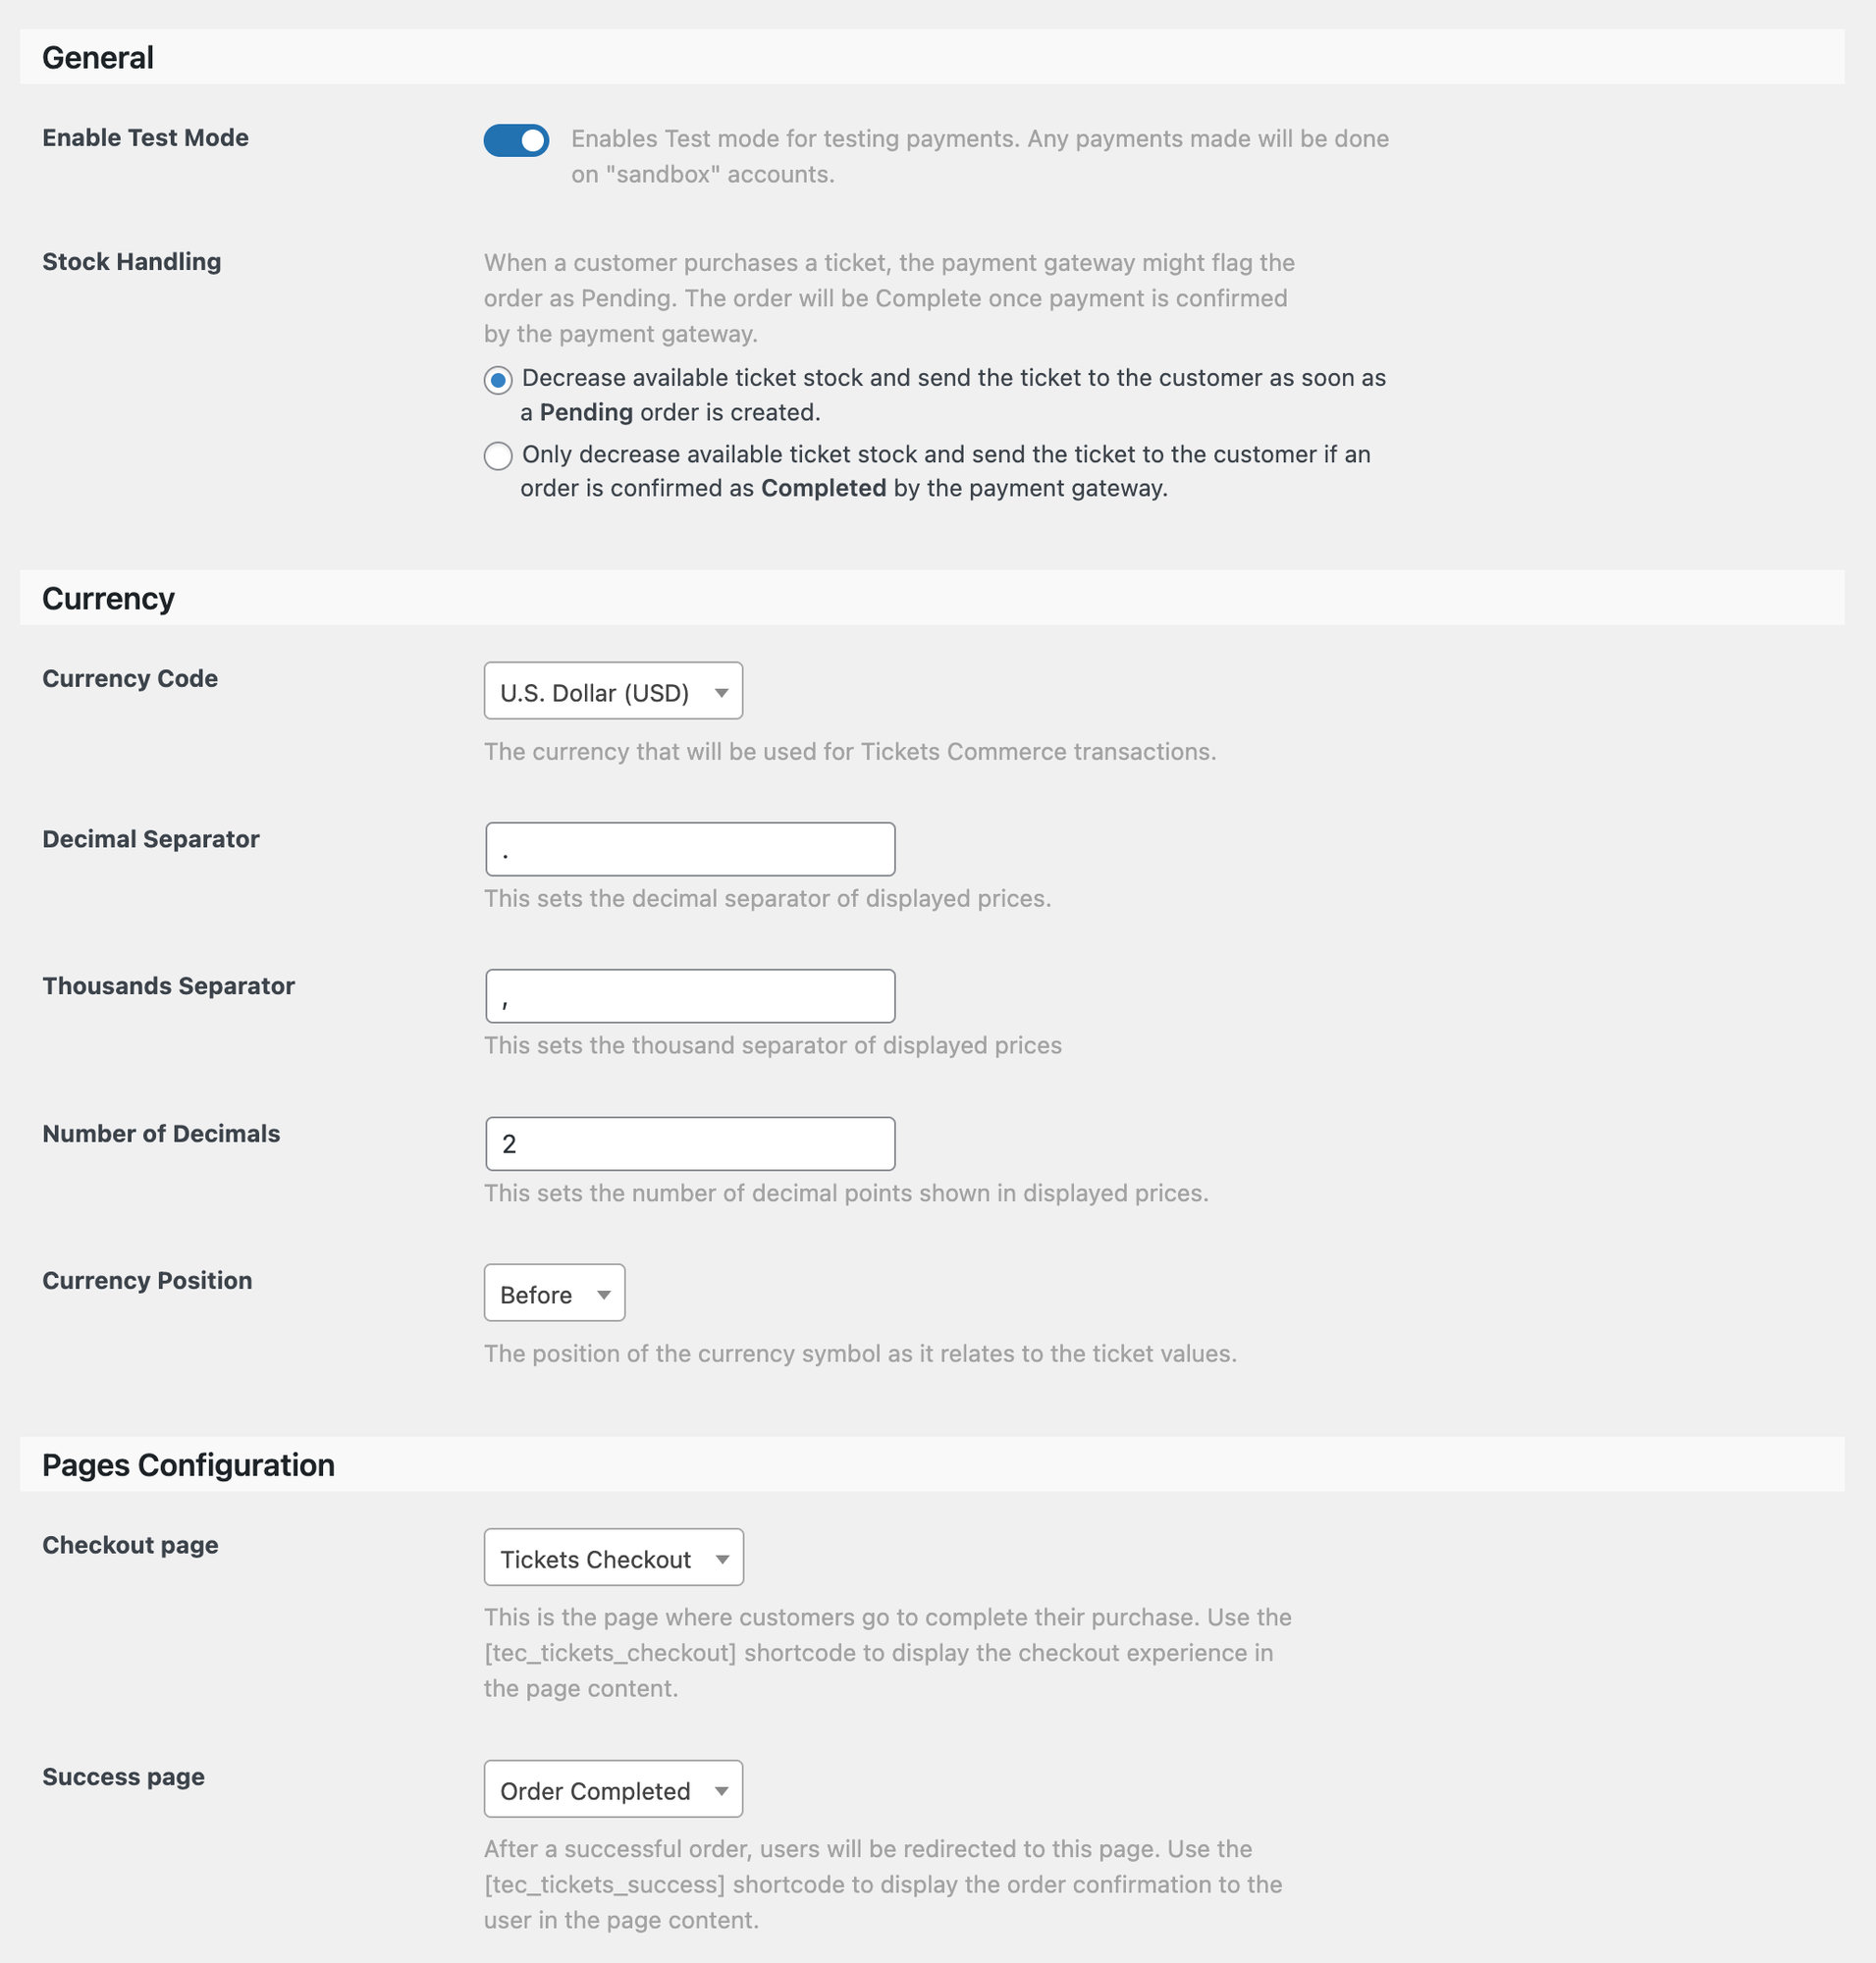
Enable Test Mode: This setting will allow you to test payments for your ticket sales. Test mode will be enabled by default.
Stock Handling: This lets you decide when in the ticket process the number of available tickets decreases.
Currency Code: Here you can choose which currency you’d like to use to collect payments with Tickets Commerce.
Decimal Separator: Here you can choose the decimal separator you’d like to use to display ticket prices with Tickets Commerce.
Thousands Separator: Here you can choose the thousands separator you’d like to use to display ticket prices with Tickets Commerce.
Number of decimals: Here you can choose the number of decimals you’d like to use to display ticket prices with Tickets Commerce.
Currency position: Here you can choose the currency position you’d like to use to display ticket prices with Tickets Commerce.
Checkout Page: You can select the page where customers go to complete their purchase. Display this page content with the [tec_tickets_checkout] shortcode.
Success Page: This is the page that users will be directed to once they complete the checkout experience. To display this to users in page content, use the [tec_tickets_success] shortcode.
Confirmation email sender address: Since version 5.6.0, this setting was moved to the emails settings on Tickets > Settings > Emails. This allows you to set the “from” email address that is used when purchase and ticket confirmations are sent to the user after purchase. By default, it is set to the site email address in the WordPress settings.
Confirmation email sender name: Since version 5.6.0, this setting was moved to the emails settings on Tickets > Settings > Emails.This is the name that displays in an email inbox. For example, using “Event Tickets” would display that as the email sender name in a user’s inbox.
Confirmation email subject: Since version 5.6.0, this setting was moved to each emails setting on Tickets > Settings > Emails. This lets you set the subject line for the email a user receives containing their tickets.
Emails
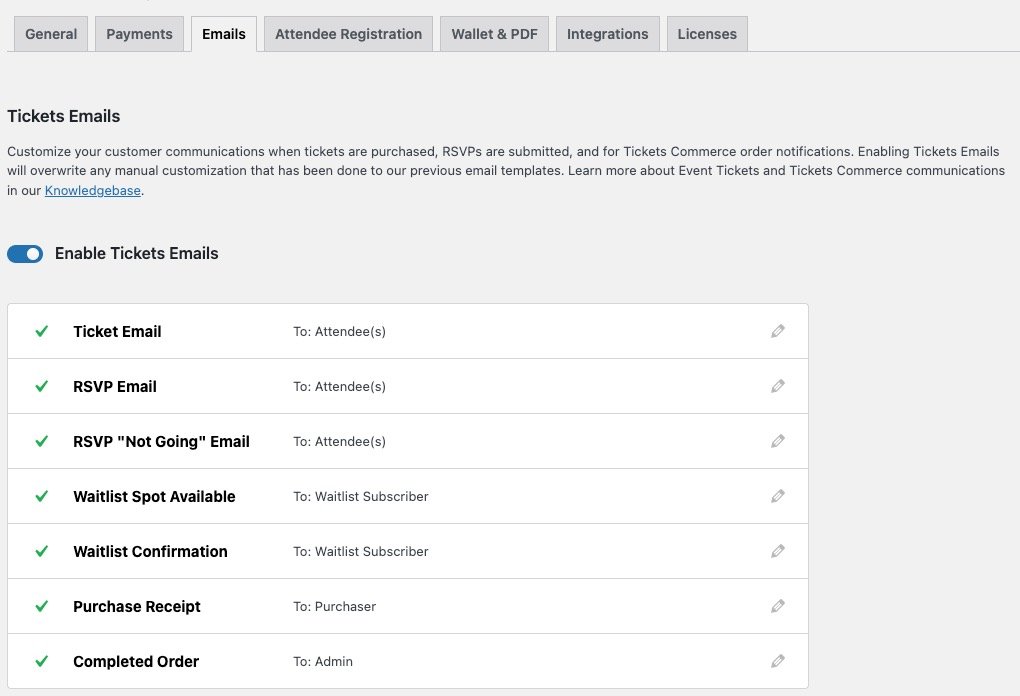
Here, you can toggle on the option to enable Tickets Emails if your Event Tickets install was before version 5.6.0. If you’re installing Event Tickets after version 5.6.0 the new emails functionality will be enabled by default.
If you have Events Calendar PRO, you should also see the Series Pass Email option.
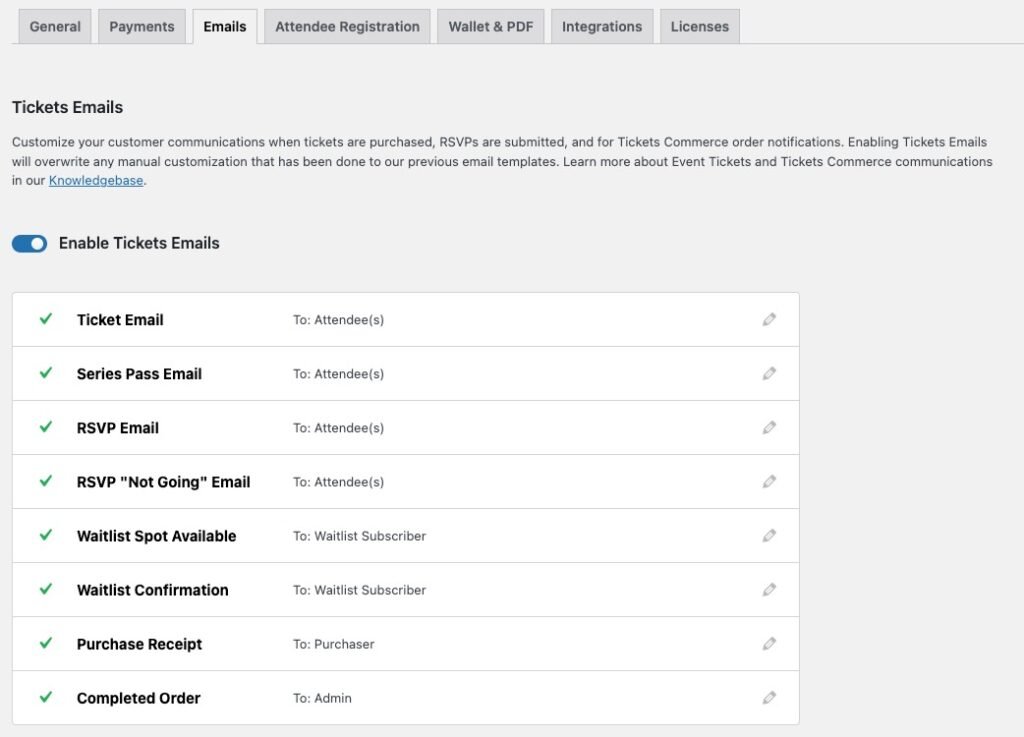
Event Tickets comes with a list of different emails that you can enable and configure separately:
- Ticket Email: The email that’s delivered with the ticket, once ticket(s) are purchased.
- Series Pass Email: The email that’s delivered with the ticket, once a series pass ticket(s) are purchased.
- RSVP Email: The email that’s delivered with the ticket, once RSVP(s) are confirmed.
- RSVP “Not Going” Email: The email that’s delivered once a user confirms that they’re not attending an event.
- Waitlist Spot Available: The email that’s delivered once a waitlist spot becomes available. The email will include the link to where they can purchase the ticket.
- Waitlist Confirmation: The email that’s delivered to the user informing them they are on the waitlist for a specific event.
- Purchase Receipt: The purchase receipt a buyer gets once buying a ticket via Tickets Commerce.
- Completed Order: The completed order confirmation a site admin gets once a Tickets Commerce order was completed.
The settings for each one of the emails listed above can be found in the following article. Below the list of emails, you’ll find general settings related to emails:
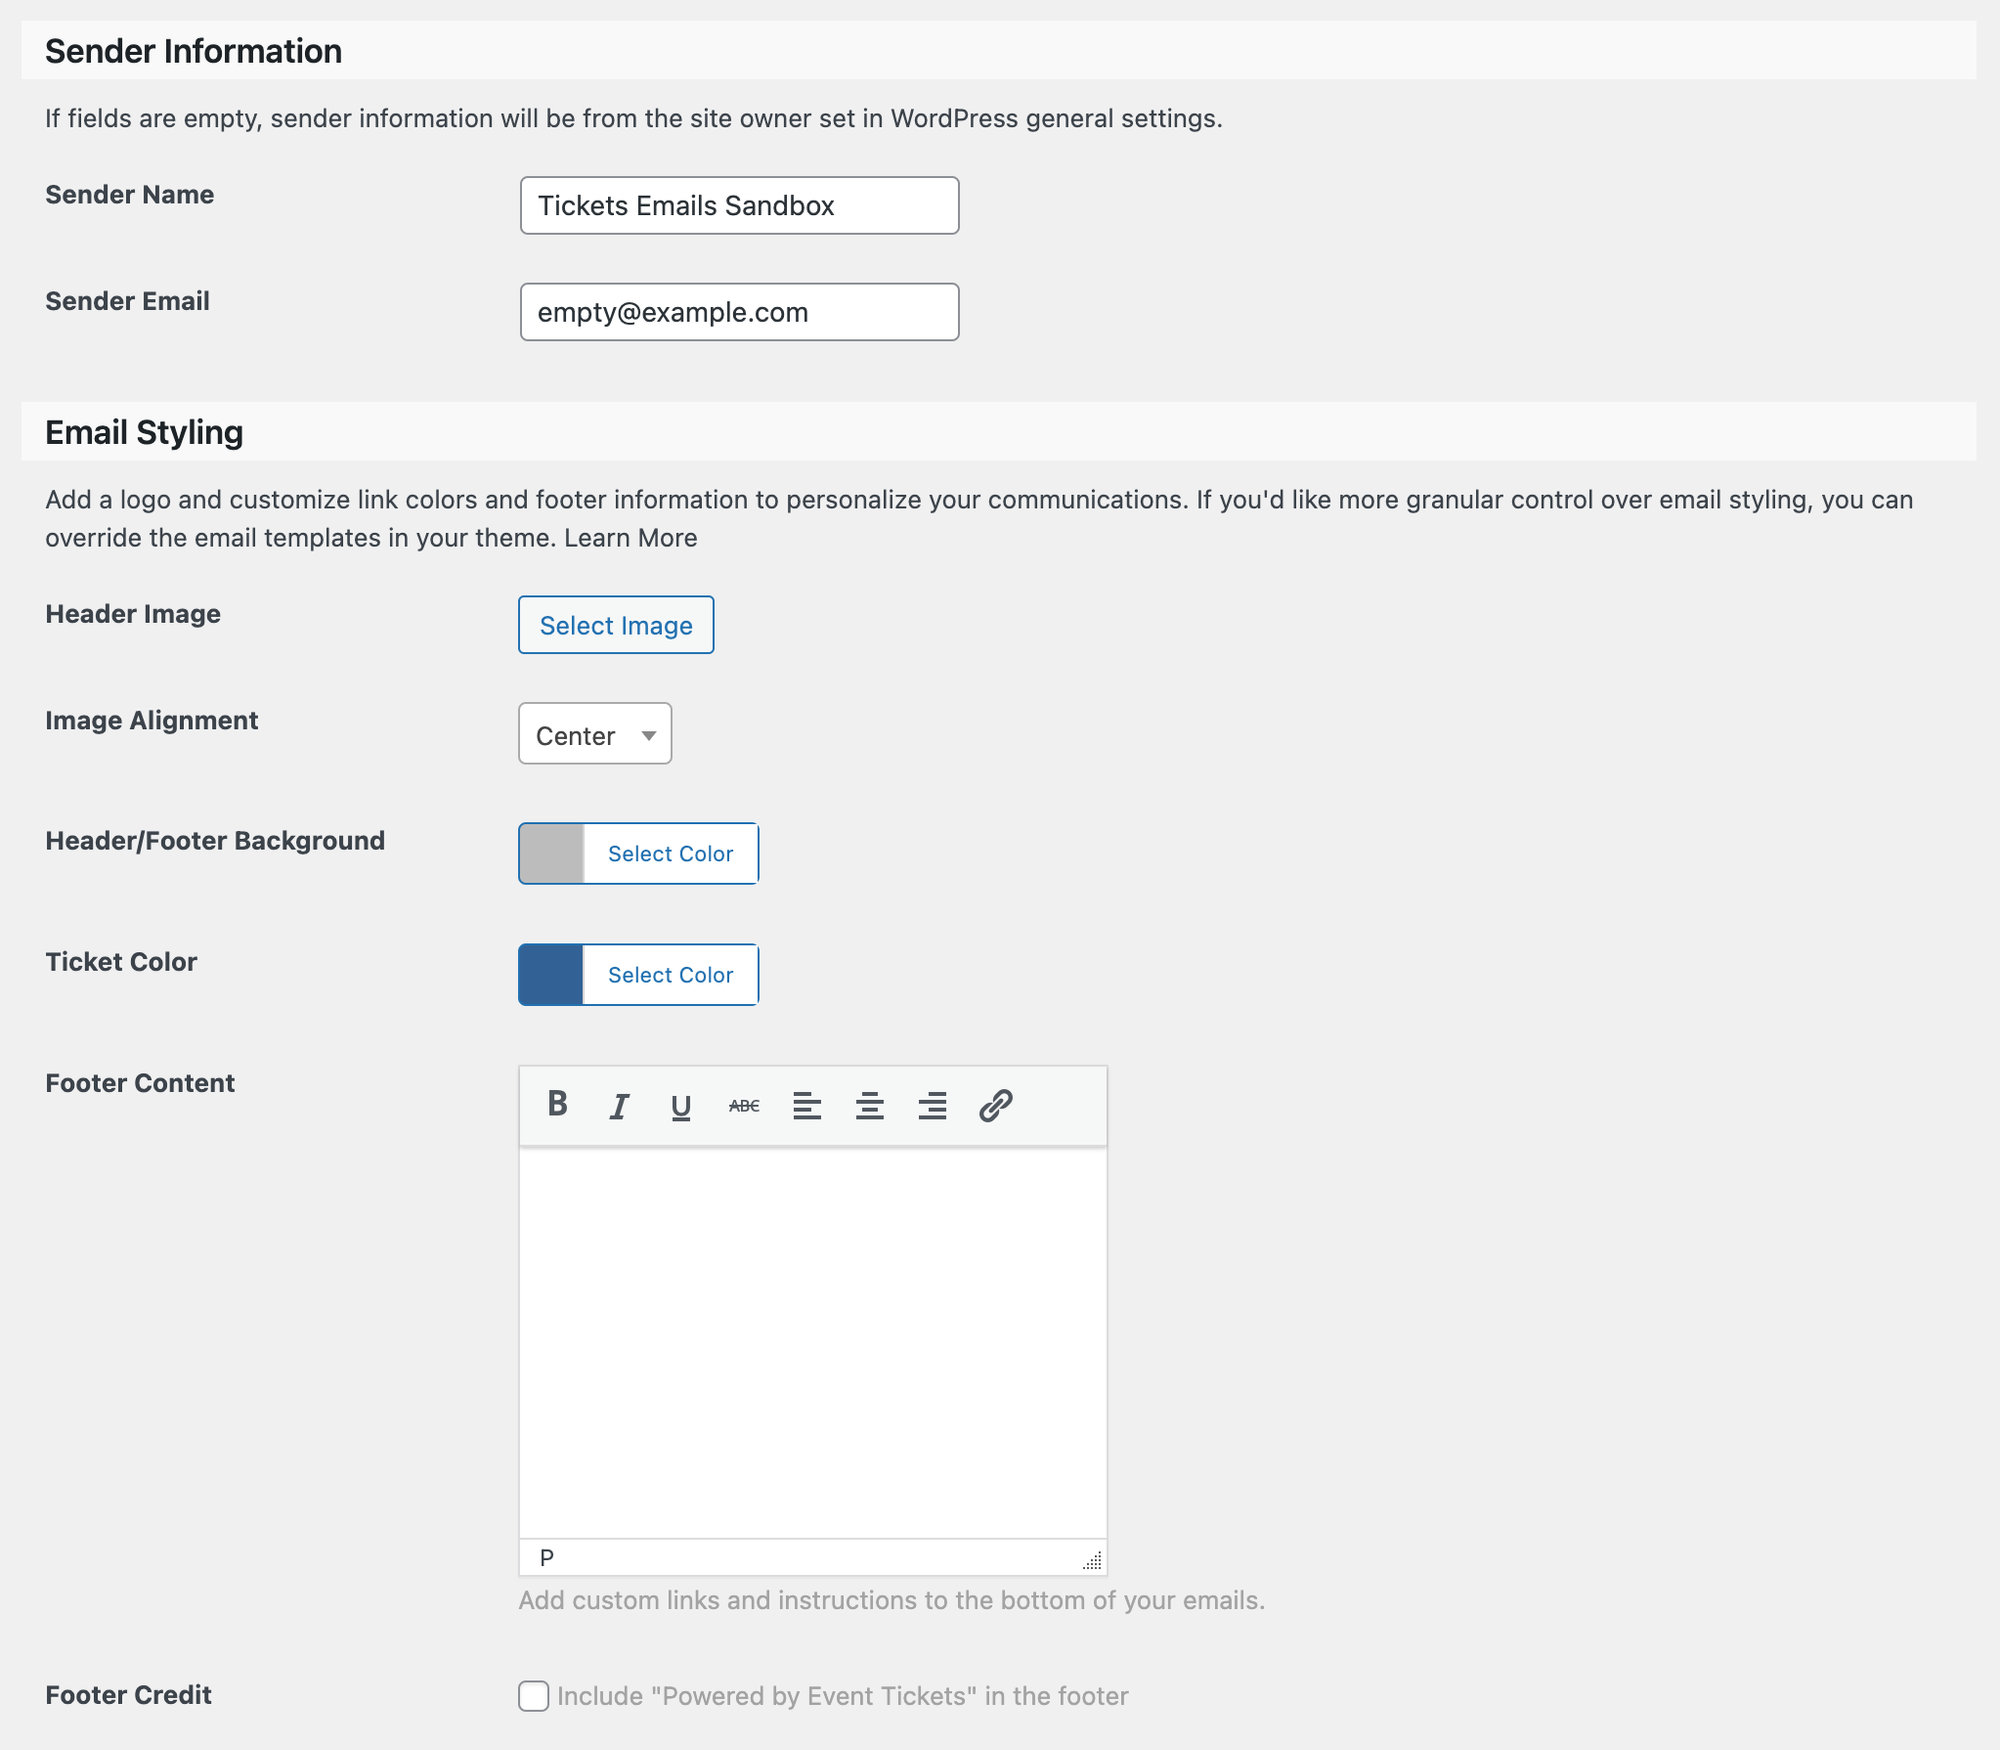
Sender name: This is the name that displays in an email inbox. For example, using “Event Tickets” would display that as the email sender name in a user’s inbox.
Sender email: The email address used as the sender of all Event Tickets-associated emails.
Header image: The email header image.
Image alignment: The horizontal alignment for the header image.
Header/Footer background: You can select the header and footer background colors from this setting. If you want to fall back to the original color, you can choose #50B078
Ticket color: The background color for the ticket section in the Tickets and RSVP emails. The system will adjust the font color of that section to match a contrast color to make the text readable.
Footer content: In this setting, you should be able to insert any information you want. The text will be placed in the footer of the email.
Footer credit: This setting will be present only if you’re running a site with Event Tickets Plus, and it’ll allow you to remove the “Powered by Event Tickets”.
You will also find a “Preview” button besides the “Save” button for all the emails related settings page, which will trigger a modal with a preview of how your emails will look.
Attendee Registration (Event Tickets Plus only)
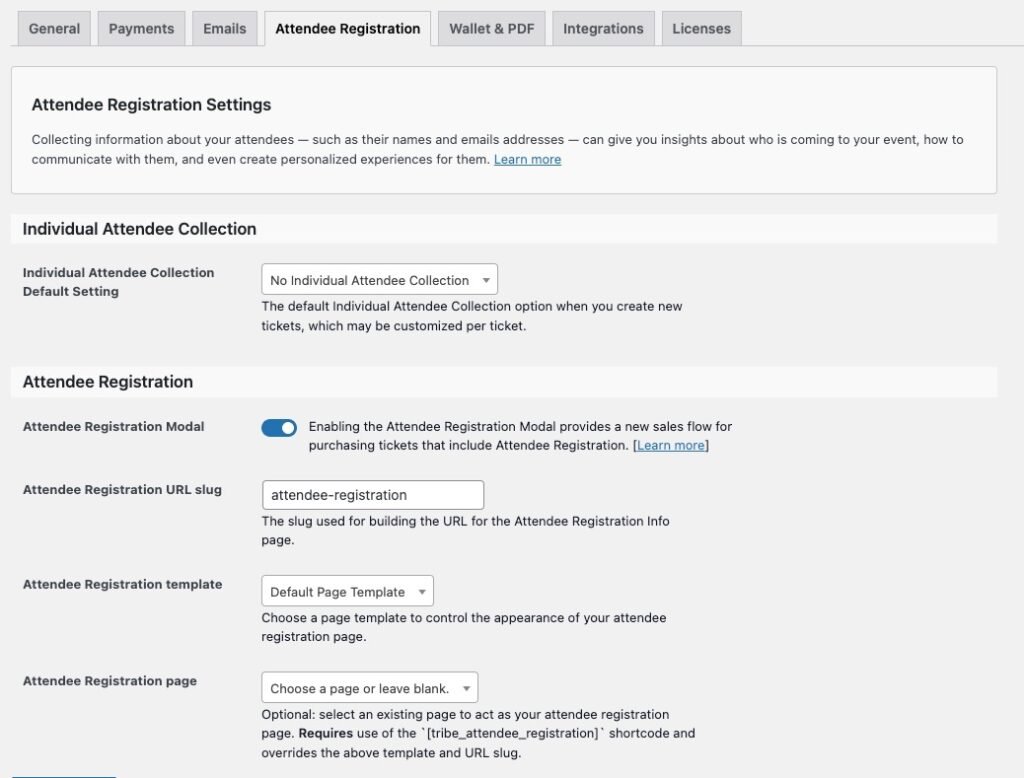
Individual Attendee Collection Default Setting: The default individual Attendee Collection option when you create new tickets, which may be customized per ticket.
Attendee Registration Modal: Provides a new sales flow for purchasing tickets that includes Attendee Registration.
Attendee Registration URL slug: The slug used for building the URL for the Attendee Registration info
Attendee Registration Template: This is the page template to control the appearance of your attendee registration page.
Attendee Registration Page: (Optional) Select an attendee registration page, using a shortcode [tribe_attendee_registration].
Wallet & PDF (Event Tickets Plus only)
Apple Wallet passes
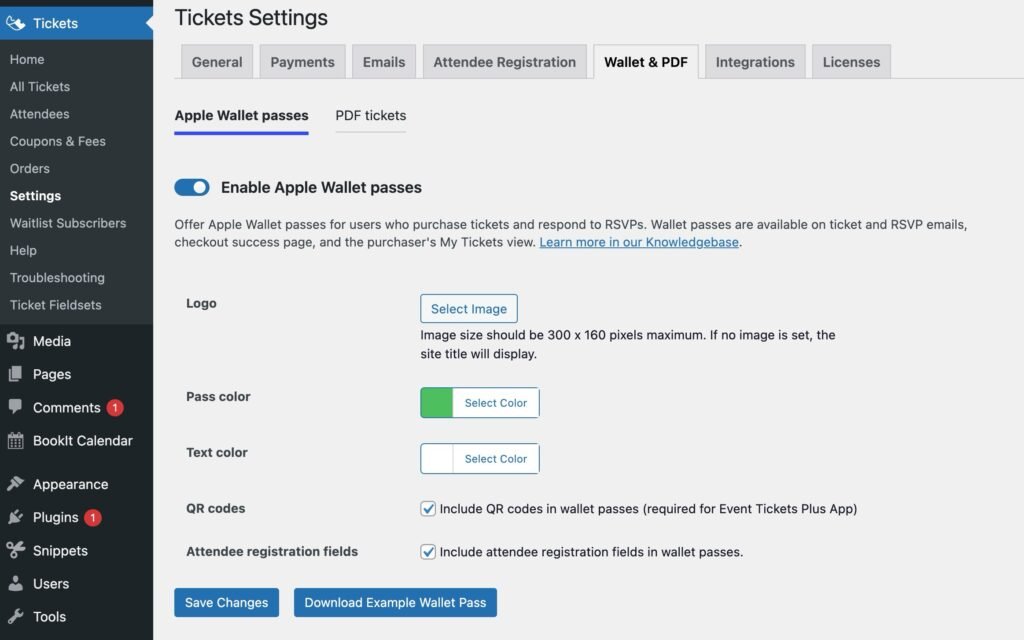
Enable Apple Wallet Passes: This is the global setting to enable or disable Apple Wallet Passes for your website. If this option is checked, it means that your Apple Wallet passes are enabled for your site, and your attendees will be able to get their passes once they buy tickets or confirm RSVPs.
If enabled, Apple wallet passes will be available for attendees after they confirm their purchase, on the “my tickets” page for an event, and in the Tickets and RSVPs emails. You can also, as an administrator, disable the inclusion of the “Add to Apple Wallet” button in emails, if needed.
Logo: This is the Apple Wallet Pass logo. By default, this setting will port the logo from the Event Tickets Emails setting (if that setting is defined). You can change the logo at any time. Please remember that if you don’t select any logo, the Apple Wallet Passes will contain the site title.
Pass color: The pass color will be the color that will serve as the background color for the passes.
Text color: The text color is the color for the texts in the passes. Please be sure that the text color has enough contrast so that it doesn’t mix up with the background color and there are no problems reading the text.
QR codes: Enable or disable the inclusion of QR codes in your Apple Wallet passes so the QR codes can be read by our app Event Tickets Plus App.
Attendee registration fields: This field is only available if you use Event Tickets Plus. You can enable or disable the inclusion of the attendee registration fields, which will be shown on the back of the passes, where there is more information.
PDF Tickets

Enable PDF tickets: This is the global setting to enable or disable PDF tickets for your website. If this option is checked, it means that your PDF tickets are enabled for your site, and your attendees will be able to get their PDF tickets once they buy tickets or confirm RSVPs.
If enabled, PDF tickets will be available for attendees after they confirm their purchase, on the “my tickets” page for an event, and in the Tickets and RSVPs emails as an attachment. You can also, as an administrator, disable the inclusion of PDF tickets in emails, if needed.
Header image: This is the PDF header image. By default, this setting will port the logo from the Event Tickets Emails setting (if that setting is defined). You can change the logo at any time.
Image alignment: The alignment of the Header image. You can choose between Left, Center, or Right.
Header color: The background color for the header. Keep in mind that the header image will be placed on top of this background color, so be sure that you select a color with enough contrast.
Additional content: You can add any additional content to your PDF tickets. Any information that you feel is relevant for the attendee. You can format this content in bold, italic, or underlined. You can also include links.
QR codes: Enable or disable the inclusion of QR codes in your PDF tickets so the QR codes can be read by our app Event Tickets Plus App.
Attendee registration fields: This field is only available if you use Event Tickets Plus. You can enable or disable the inclusion of the attendee registration fields.
Footer credit: Select if you want to include the “Powered by Event Tickets” credit in the footer.
Integrations (Event Tickets Plus)

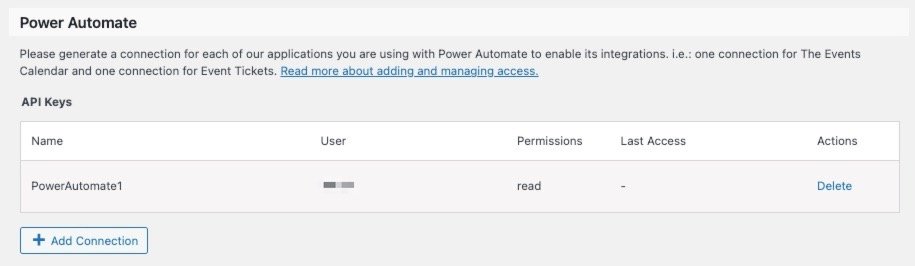
Event Tickets Plus App
Use QR Codes: Check whether to include QR codes in ticket emails (requires Event Tickets Plus).
Restrict Check-in: Check whether to allow check-in of QR tickets during the date and time of the event.
Check-in Window: Decide how far in advance to begin checking in attendees. You will need to enable the “Restrict Check-in” setting before.
WooCommerce Support
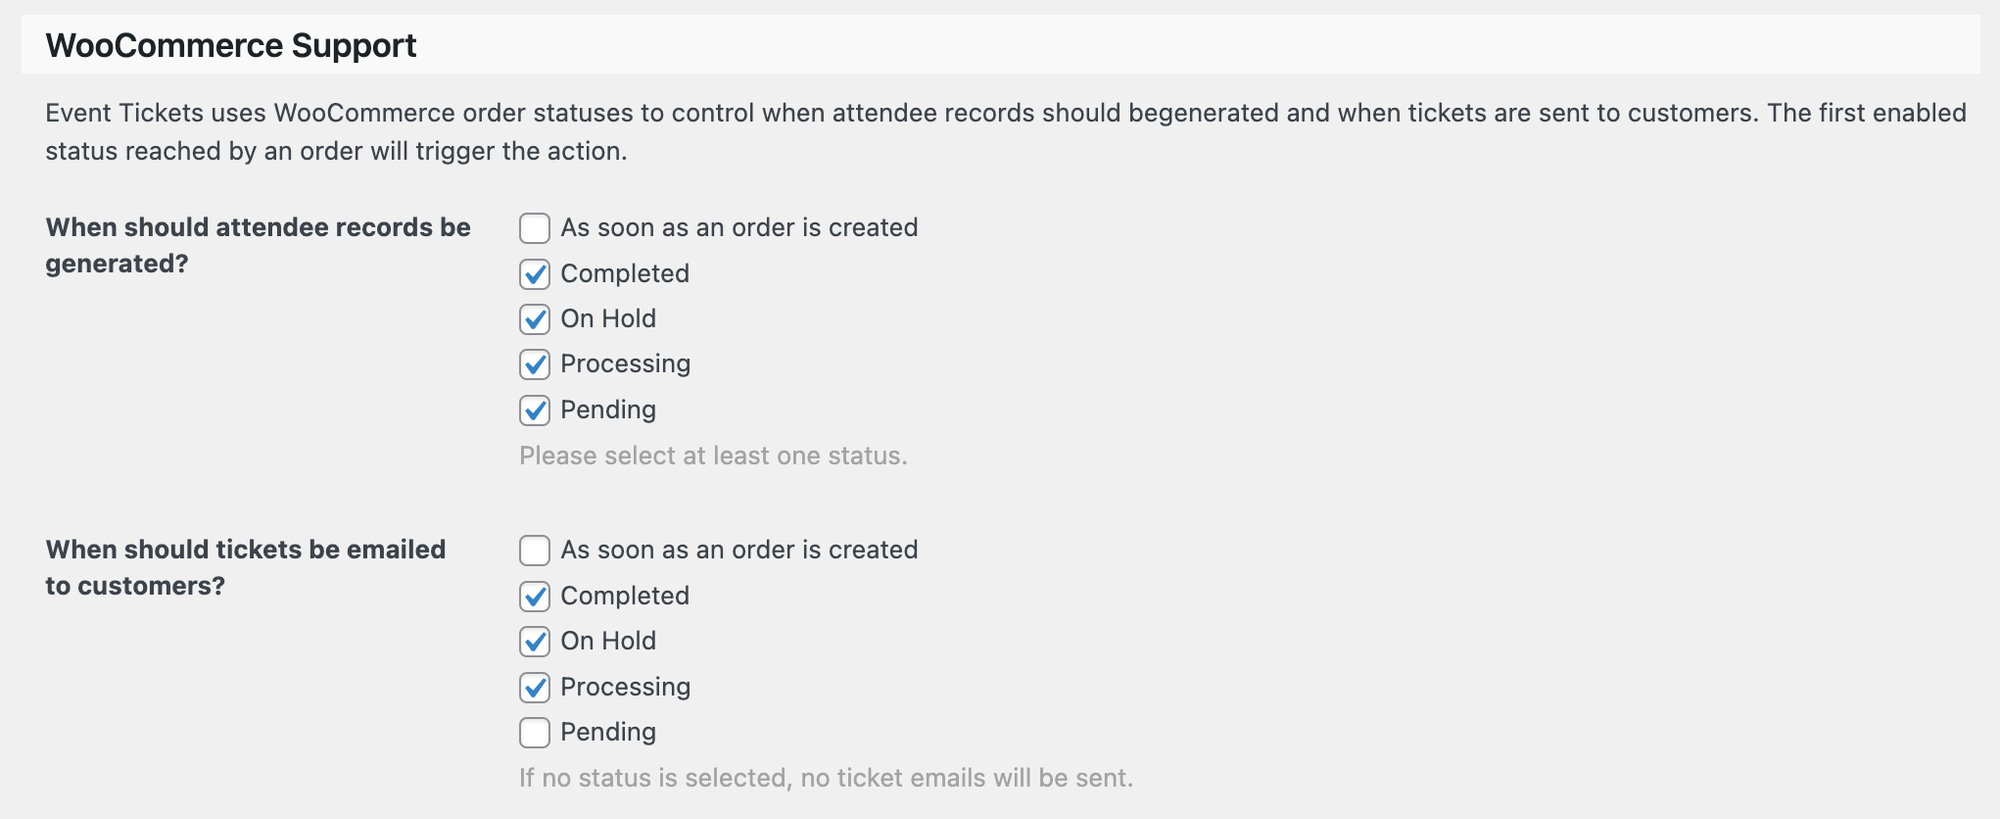
When should attendee records be generated? Choose a status for when attendee records are generated.
When should tickets be emailed to customers? Choose a status, otherwise, no email will be sent.
Licenses
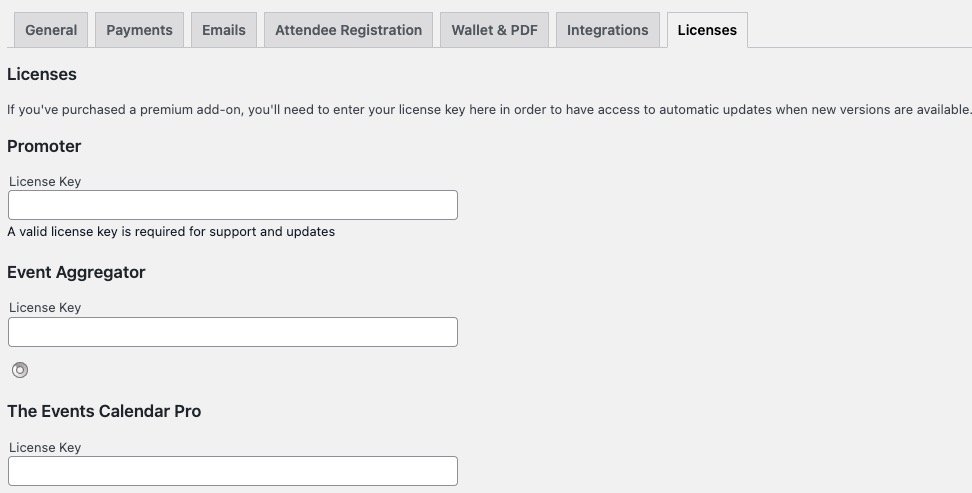
License Key: Event Tickets does not require a license. But if you are using our Promoter automated email marketing service with Event Tickets, then this is where you can enter the license key for Promoter.
Event settings
Using Event Tickets alongside The Events Calendar presents additional plugin settings.
Ticket Settings
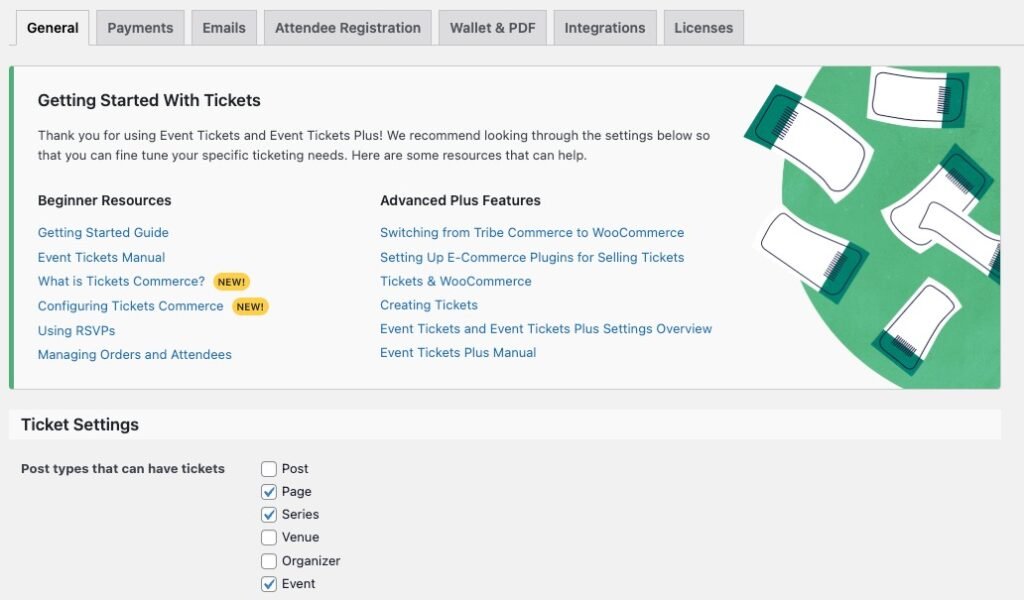
- Post types that can have tickets: An “Event” option is added to the list of options. When enabled, tickets can be created for Event posts in the WordPress editor. If you’re using Events Calendar Pro, you’ll also see an option for Series.
- Location of RSVP form: Determines where the RSVP form is located on an event post. The options include:
- Below the events details (default)
- Above the event details
- Below the event description
- Above the event description
- Display # tickets left threshold: Allows you to remove the text in the ticket form that displays how many tickets are left when a specified number of tickets are left. Leave this field blank to always display the number of tickets available.
Tribe Commerce (discontinued)
Note: Tribe Commerce is our legacy e-commerce solution. All new installs will only see the option to enable Tickets Commerce instead. See the Payments tab for more information on enabling Tickets Commerce.
- Currency symbol follows value: Users with a default currency that follows the amount can check this box to have the currency symbol show after the money value. This only applies to Event Tickets Plus users.
Limiting Ticket Purchases
Limiting in General
By default, tickets and RSVPs are limited to a maximum purchase of 100 (since Event Tickets 4.11.5).
It is possible to increase or decrease the limit with the filter tribe_tickets_get_ticket_max_purchase in your functions.php file or as a separate plugin.
Let’s say you want to limit users to purchase just one ticket per person in a single checkout. You can add the snippet to your site, such as your theme’s functions.php file:
add_filter( 'tribe_tickets_get_ticket_max_purchase', function() { return 1; } );
If you would like to set the limit to a higher number, e.g. 5, you need to take into consideration, that there might be less than 5 tickets available. In that case, the snippet needs to be extended a bit, like this. This will make sure that the customer can only put 5 tickets into the cart, or the maximum available, if that is less than 5.
add_filter( 'tribe_tickets_get_ticket_max_purchase', function( $available_at_a_time ) {
	return min( 5, $available_at_a_time );
} );
Limiting for a Specific Event
To limit users’ purchases to one ticket per person for a specific event or specific ticket, here’s a starter snippet:
function tecsupport_change_max_qty_able_to_add_to_cart_at_a_time(
  $available_at_a_time,
  $ticket,
  $event,
  $ticket_id
) {
    if ( 12345 === $event->ID ) {
    $available_at_a_time = 1;
  }

  return $available_at_a_time;
}

add_filter( 'tribe_tickets_get_ticket_max_purchase', 'tecsupport_change_max_qty_able_to_add_to_cart_at_a_time', 10, 4 );
A similar if condition can be used to limit purchases for a specific ticket where the $ticket_id is the post ID of the ticket:
function tecsupport_change_max_qty_able_to_add_to_cart_at_a_time(
  $available_at_a_time,
  $ticket,
  $event,
  $ticket_id
) {
    if ( 12345 === $ticket_id || $ticket->name === 'VIP' ) {
      $available_at_a_time = 1;
    }

  return $available_at_a_time;
}

add_filter( 'tribe_tickets_get_ticket_max_purchase', 'tecsupport_change_max_qty_able_to_add_to_cart_at_a_time', 10, 4 );